Via Microsoft Customer Service add a nick name in windows 10 account
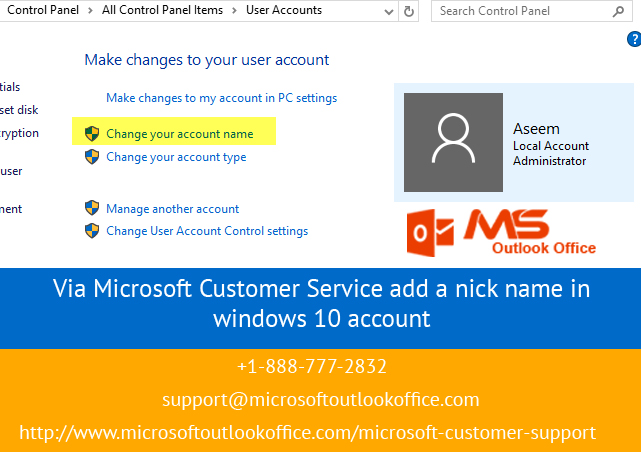
When you create a new account in
your windows 10, it uses first five letters of your MS account as the internal
account name. This name will be shown in the profile folder as well as when you
manage your accounts via command line. Though, this may not be a concern for
you, but many people find it annoying. Since, windows 10 don’t even provide an
option to use a custom name in your profile.
However, if you wish to use your
real name or a nickname as your internal account name and profile folder name,
than with the help of Microsoft Customer Support you can easily do that. There is a workaround by which you can set
up an account with a custom name while using your Microsoft account
information.
Here, you can see how to add a
different name on your windows 10 account instead of using just a part of your
MSA address.
Look at the procedure to set up Microsoft account on Windows 10 with a
customized name:
In order to create an account
that uses a custom profile name, firstly you need to create a new administrator
local account. After that, move all your data in to that account and remove the
old account and finally you will be able to switch to a Microsoft account.
Steps to connect a Microsoft account:
1. Create
a local account with the username you want in your profile folder.
2. Change
your account type to include administrative rights
3. Install
all the apps and save all your files into your system.
4. Once
you have created the local account and transferred your entire data to this
account, then you need to remove the old account in order to switch to a
Microsoft account.
The last action to complete the
procedure is to connect your new local account with your personal Microsoft
account. You can do this by following these steps:
1.
Open Settings in your windows 10 PC.
2.
Go to Accounts and click on your info
3.
Tap on the “sign in with a Microsoft account
instead” link
4.
Enter your Microsoft account address or username
and click next.
5.
Enter your Microsoft account password and click
on sign in.
6.
Now, here you need to enter your current local
account password and remember that next time you log in your windows 10 you
need to enter your MSA password to sign in.
7.
Simply click next and thus you are good to go.
After applying these steps
carefully, you can start using your windows 10 with a new custom profile name. However,
if any issue persists while applying these simple steps, then don’t hesitate to
grab Microsoft Customer Service. By
taking aid from their professionals you can simply connect your local account
with a Microsoft account effortlessly.


Comments
Post a Comment